Years ago, I saw a product at a hair show called "Hair Scroos". The idea was a stroke of genius! These hair pins were in the shape of a double helix spring that you screw into, let's say, a bun and they kept the hair in place amazingly well. They cost about fifty cents a piece and I bought a bunch. When they were all gone, the search began for more with no luck.
Miracle of miracles, last year a client told me Goody came out with a version of them called "Spin Pins" I was elated! Off to Walgreens I went to buy these "spin pins" and found they were $6.50 (plus tax) for two pins. Really? That's outrageous! It was time to take matters into my own hands.
After an exhaustive web search, a long hair forum had a tutorial with out of focus pictures, but great ideas. You can make your own for about 10 cents each. Here's what you'll need:
Supplies
*3/8" wooden dowel ($1.18)
* Needle nose pliers ($1.88)
* 16 gauge steel wire ($4.88 for 3.5 lbs or 330 feet)
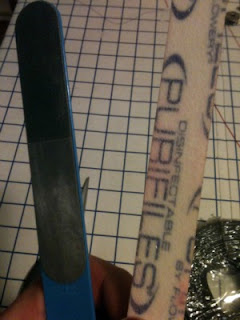
* Coarse and fine grit sandpaper, or nail files from Sally's Beauty Supply ($1.39 for 3 way file)
* Metal safe spray paint in your desired hair color ($0.97 to $6.28)
* I already had a spin pin to use as reference, but you don't need to buy one since the point of this is to make your own
Each pin will cost approximately $0.10 to $0.11 if you don't already have some of these items.
Here are the specifics:
 |
| Sorry about the fuzzy! |
Prep the Dowel
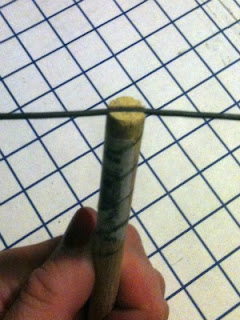
When you are at the hardware store of your choice, they usually have a work station where you can cut your own wood to size. Use their saw (unless you have your own) and cut a notch in the end of the dowel big enough to hold the wire in place. Cut the dowel to a more workable length. Since the wire is to be cut to 10", that would be a good length so you can use the dowel to measure your wire later.
Mark the dowel at 3/8" intervals starting below the notch on both sides.
Draw from the notch down in a spiral pattern connecting with every other line you marked.
Repeat on the other side.
Draw from the notch down in a spiral pattern connecting with every other line you marked.
Repeat on the other side.
This wire was $4.88. It's the kind used for re bar. It's packed in bearing grease. Bearing grease is nasty. However, after using alcohol to remove the nasty grease, the rough surface is perfect to spray paint. I have a feeling it's probably a lot less expensive than wire that's not packed in grease.
Cut the Wire
Measure your wire to 10". Make sure your wire is nice and straight. If you cut your dowel to 10", then use it to measure. This is a guideline, not a rule. You can make your pins shorter or longer- knock yourself out. If you want them to be the same length as Goody's, then go with 10". Use the wire cutter on your needle nose pliers for this task.
Smooth the Ends
Now, use your coarse grit sand paper or coarse grit nail file to smooth the ends of the wire. Once they are fairly smooth, use the finer grit to really polish. If you are using nail files, get a buffing file that has several grades of grit. The more smooth the ends are, the less they will pull your hair. You want to do this process before you start bending the wire. Trust me, it's a lot easier.
Start Forming the Spiral
Place the wire in the notch- make sure it is centered.
Push down both sides of the wire as close to the dowel as you can get them. You can use the pliers to clamp the wire down if you put a cloth over it first. If you don't protect the wire, it will be rough and pull your hair. Start twisting the wire down the dowel according to the pattern you have drawn. When you get to the end, use the pliers again to clamp the (protected) wire close to the dowel.
Your new "spin pin" should look like this:
Your new "spin pin" should look like this:
Paint the Pin
So now you have your finished pin, but it's the wrong color. No problem, grab some metal-safe spray paint and remedy that problem. Use what's left of the dowel, and hang your pin or pins from it with string, ribbon or whatever you have handy. I used left-over curling ribbon.
Spray paint about 12" away in a well ventilated area, or even better, outside. Make sure to get all sides, but don't over do it. You don't want drips. Place the free end of the dowel under a book or something weighty on a shelf so the pins can hang free and dry over night.
And here you have it- an inexpensive version of Goody's Spin Pin you made yourself for pennies on the dollar! Not too shabby.
Thanks to Tameriska at The Long Hair Community for posting the original tutorial:


